 Speedy UK Deliveries
 100% SECURE PAYMENT
 VOLUME DISCOUNTS
 Contact us
Speedy UK Deliveries100% SECURE PAYMENTVOLUME DISCOUNTSContact us
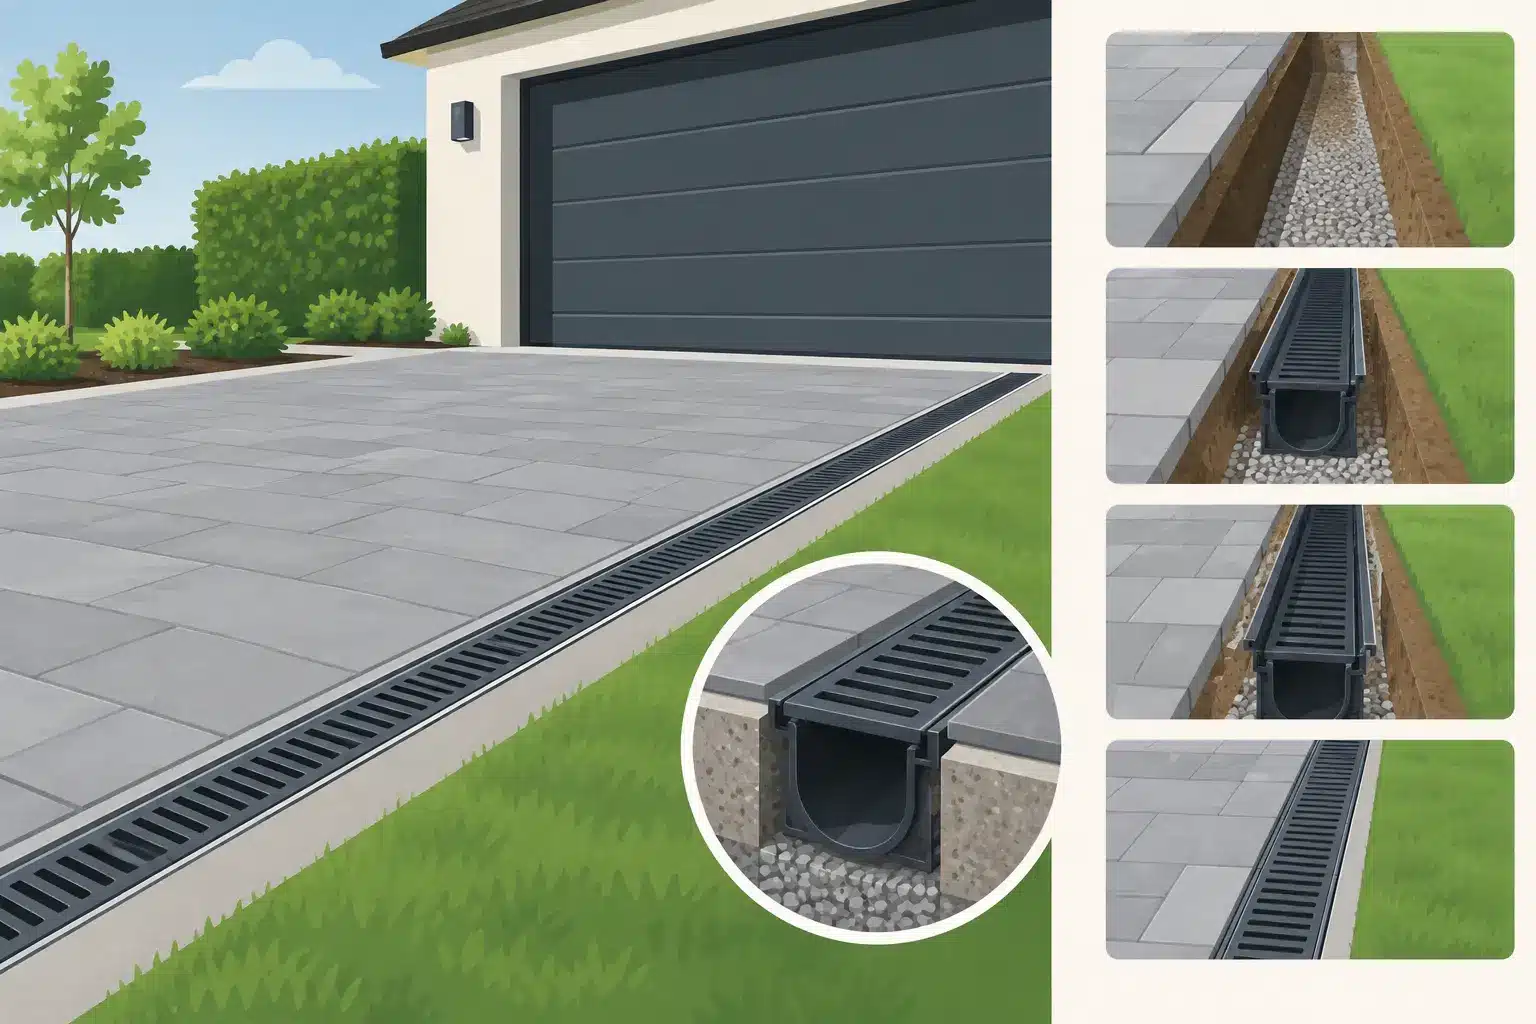
A channel drain that sits a few millimetres too high can direct surface water straight back across a driveway. One that is installed without a proper concrete surround can move under vehicle loads, crack the finished surface and create the same problem all over again. Knowing how to fit channel drainage properly is therefore less about dropping a length of plastic into a trench and more about getting levels, support and the discharge point right from the outset.
This guide covers a typical domestic installation across the entrance to a garage, at the base of a driveway slope or beside a patio. Always check the installation guidance supplied with the specific channel system, particularly where a manufacturer specifies bedding depth, concrete strength or a loading class.
Start by identifying where the collected water will go. A channel drain needs an outlet connection at its low point, usually leading to a suitable soakaway, surface-water drainage run or approved rainwater system. It must not simply discharge onto the pavement, public highway or a neighbouring property. Connecting new surface water drainage to a public sewer may also require permission from the relevant water company.
For many domestic projects, a correctly sized soakaway is the practical answer, provided ground conditions allow it and it is positioned clear of buildings and boundaries in line with current requirements. If the site has poor-draining clay, a high water table or limited space, establish a compliant discharge arrangement before excavating. The channel is only one part of the system.
Mark the proposed run on the surface and decide where the outlet will sit. Channel drainage is commonly installed across the full width of a driveway, immediately in front of a garage threshold, or along the edge of a patio where water naturally gathers. Keep the run straight where possible. Although channels can be cut and joined around corners, every change in direction adds joints that need careful sealing and support.
Choose a channel and grate suitable for the location. A pedestrian patio does not need the same load rating as a block-paved driveway used by cars or vans. Check the manufacturer’s stated load class and select a system intended for domestic vehicle traffic where appropriate. The grate should also suit the finish: galvanised steel, plastic and decorative options are available, but load rating and compatibility matter more than appearance.
The top of the fitted grate should normally finish flush with, or marginally below, the surrounding surface. A proud grate catches tyres, boots and garden equipment. A channel set too low can leave an awkward trough at the edge of paving and may allow debris to build up.
Work from the finished surface level rather than the existing ground. Set up a string line, laser level or straightedge across the proposed drain position to establish the final height. Driveways and patios should fall towards the channel, not away from it. As a practical rule, a fall of around 1:80 is often used for paved external surfaces, though the right gradient depends on the layout, surface material and drainage design.
Some channel drainage systems have an inbuilt fall. Others have a flat base and rely on the outlet position and the surrounding paving falls to move water. Do not assume every product is self-falling. Check whether the lengths need to be installed in numbered sequence, and ensure the outlet is located at the intended low end.
Allow for the channel depth, the bedding below it and the concrete support at each side. This is where many installations run out of depth. The connection to the outlet pipe must also have enough fall to drain freely, so confirm pipe levels before digging the full trench.
Cut the driveway, paving or concrete cleanly to the planned width, then break out the material and excavate a trench. Make it wide enough to provide the manufacturer’s required concrete haunching on both sides of the channel. Do not squeeze a channel into a trench that only just accepts the body of the drain: it will not have adequate lateral support.
Excavate to a firm, undisturbed base. Remove loose soil, organic material and any soft spots. Where the formation is weak or variable, compact a suitable granular sub-base before placing the bedding. The exact trench depth depends on the channel body and finished level, but there must be room for a stable concrete bed beneath the unit.
Install the outlet fitting before placing the channel lengths. Depending on the system, this may be a vertical outlet, end outlet or sump unit. Connect it to the underground surface-water pipework using compatible fittings and make sure the pipe run is supported and laid to an adequate fall. Standard underground drainage pipework is often 110mm, but follow the outlet size and the drainage design rather than forcing an unsuitable connection.
If using a catch pit or silt trap, position it where it remains accessible for cleaning. Channel drains collect grit, leaves and moss as well as rainwater. A system that cannot be maintained will eventually lose capacity.
Dry-lay the channel lengths first to check the full run, outlet position and end caps. Keep the grates fitted during installation, or use the manufacturer’s protective cover, so the channel body holds its shape and concrete cannot enter the waterway. Remove any temporary cover only once surrounding work is complete.
Place a continuous bed of stiff concrete in the trench, not isolated blobs. Set the first channel section at the outlet end and press it into the bedding to the correct line and level. Check the grate height against the finished surface frequently. A long spirit level and straightedge are useful here, but a laser level is quicker on a longer driveway run.
Join subsequent lengths in the direction shown by the manufacturer, commonly following the water flow. Push joints fully home and use any supplied seals, clips or jointing compound as specified. Small gaps allow concrete fines and soil to enter, while a poorly seated joint can create a snag point for debris inside the channel.
Once the channel is level and secure, place concrete haunching evenly along both sides. Bring the concrete support up to the height recommended for the chosen system, particularly where vehicles will cross it. Compact and finish the concrete carefully without pushing the channel out of line. Recheck levels before the concrete starts to cure.
Avoid loading the installation until the concrete has gained sufficient strength. The curing period depends on the mix, weather and manufacturer instructions. Rushing paving, tarmac or vehicle traffic over fresh haunching is a false economy.
For block paving, reinstate the sub-base and bedding layers so the blocks finish neatly against the channel edge. Use proper edge restraint where required, as loose blocks can migrate towards the drain under wheel loads. For concrete or resin-bound finishes, follow the surfacing contractor’s jointing and curing requirements so movement at the channel edge does not cause cracking.
Tarmac needs particular care because hot material and compaction equipment can damage lightweight channel bodies if the surrounding concrete has not cured properly. In all cases, keep the grate protected from mortar, concrete and surface dressing. Hardened residue is difficult to remove and restricts water flow.
Before handover, run water along the surface and through the channel. Check that it reaches the outlet without ponding, that no joints leak into the trench and that water flows through the downstream pipework. This simple test is easier before the work area is fully reinstated.
The most frequent problem is relying on the channel alone to correct a badly graded driveway. If the finished surface falls away from the drain, water will bypass it regardless of how well the channel has been installed. Equally, fitting a domestic light-duty channel where regular vehicle traffic passes can lead to distorted grates and broken edges.
Poor support is another repeat offender. A channel needs continuous bedding and properly formed concrete haunching, not backfilled soil or a thin strip of mortar. Leaving the outlet as an afterthought is equally risky: a correctly fitted drain is useless if its pipework has no fall, is undersized or discharges to an unsuitable location.
Finally, plan for cleaning. Lift the grates periodically, remove silt and leaves, and flush the outlet connection. On tree-lined driveways or busy commercial yards, this may need doing more often than homeowners expect.
A well-installed channel drain should disappear into the finished surface while quietly keeping water away from doors, garages and foundations. Taking time over the levels and the concrete support gives the installation the best chance of staying that way through years of rain, traffic and routine use.









 Sign in
