 Speedy UK Deliveries
 100% SECURE PAYMENT
 VOLUME DISCOUNTS
 Contact us
Speedy UK Deliveries100% SECURE PAYMENTVOLUME DISCOUNTSContact us
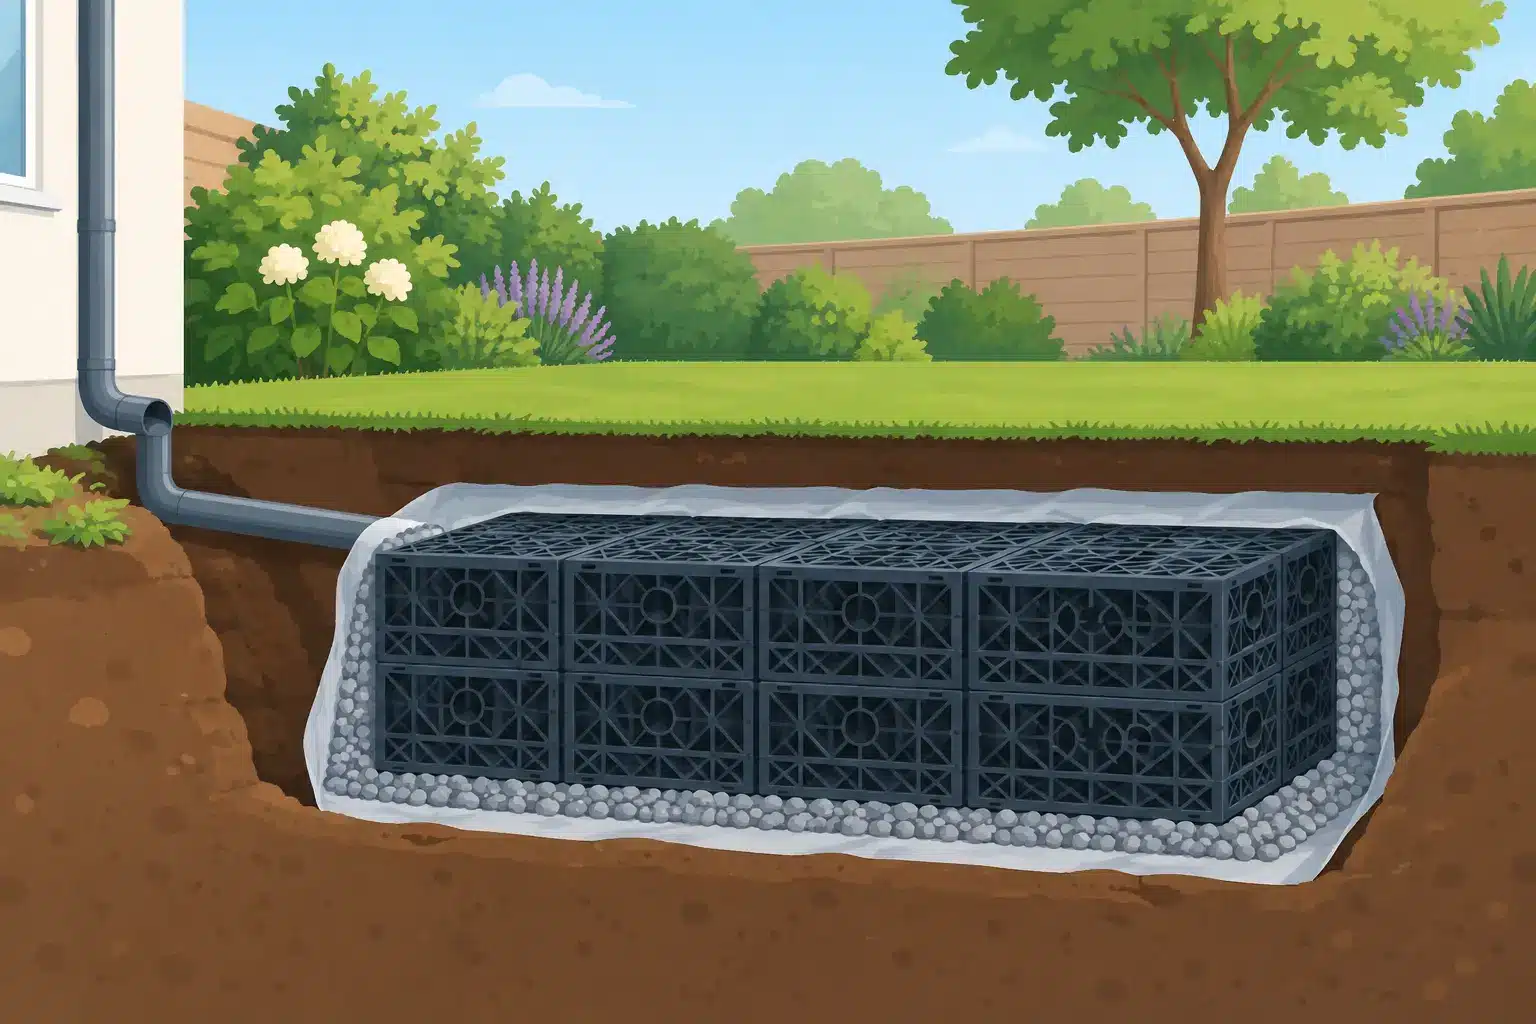
A soakaway that is too small, wrapped in the wrong material or connected to the wrong drainage run can quickly become an expensive hole in the ground. Knowing how to install soakaway crates properly means planning the location and capacity first, then building a clean, protected underground storage void that allows rainwater to infiltrate into suitable ground.
Crate systems are widely used for managing roof water, channel-drainage runoff and hardstanding drainage where infiltration is viable. They offer far more storage than loose gravel, are easier to calculate accurately and can be configured to suit domestic gardens, driveways, extensions and larger commercial schemes. The installation itself is straightforward for an experienced groundworker, but ground conditions, pipe falls and membrane selection all matter.
A soakaway crate is not a universal answer to surface-water drainage. It relies on the surrounding subsoil accepting water at a sufficient rate. Clay-heavy ground, a high water table, contaminated land and sites close to foundations may make an infiltration system unsuitable or require a different drainage design.
Start with a percolation test designed for the site conditions. For larger works and projects requiring formal calculations, this is normally undertaken in line with BRE 365. The result helps establish the infiltration rate and, along with the roof or paved area being drained, determines the required storage volume. Guessing capacity from the number of crates alone is a common mistake.
Check the project drawings, local authority requirements and any planning conditions before excavation. Surface water should not be connected to a foul drain. For extensions and new drainage works, Building Regulations Part H and local SuDS requirements may affect the proposed arrangement. A soakaway should also be positioned well clear of buildings and other structures. A common minimum is 5 metres from a building, but the final distance depends on the ground, foundations and approved design.
Avoid placing the system where it could undermine retaining walls, affect neighbouring land or receive traffic loading beyond its stated specification. If the crates will sit beneath a driveway, choose a crate system rated for the expected load and build it to the manufacturer’s requirements.
The crates are only one part of the installation. You will normally need compatible underground drainage pipe and fittings, a suitable access or inspection point where specified, clean angular stone if required by the design, protective geotextile membrane, pipe bedding material and backfill.
For a conventional infiltration soakaway, use a permeable non-woven geotextile membrane. This keeps soil particles out of the crate void while allowing water to pass into the ground. Do not substitute a waterproof geomembrane, which is used for attenuation tanks where water must be contained and discharged at a controlled rate.
A practical installation also needs a laser level or string line, tape measure, shovel or excavator, compactor, pipe cutter, marker spray and appropriate personal protective equipment. Deep excavations need proper attention to safe access, trench support and spoil management. Never work in an unsupported excavation where the sides may collapse.
Mark the crate location, incoming pipe route and any inspection chamber position before digging. Establish the pipe fall from the gully, downpipe connection or channel-drainage outlet to the crate. Underground drainage pipework needs a consistent fall that allows water to move freely without being excessively steep.
Use the correct pipe size for the flow and connection details. Domestic rainwater systems commonly use 110mm underground drainage, while larger collection areas may require a bigger pipe run or multiple inlets. Include rodding access where the layout, pipe length or bends make future maintenance difficult.
Dig the pit wide and long enough to accommodate the full crate assembly, membrane overlaps and working room. The depth must account for the finished ground level, cover requirements, pipe entry level, crate height and prepared base.
Keep the excavation base level. Remove loose material and sharp stones that could damage the membrane. If the design calls for a granular levelling layer, install and compact it evenly. Do not improvise a thick stone base where it has not been specified, as this can alter the installation level and pipe connection.
Excavated spoil should be kept back from the pit edge. Apart from reducing the risk of collapse, this gives you cleaner access when wrapping and connecting the crate system.
Lay the non-woven geotextile across the base and up all sides of the excavation, leaving enough material to fold across the top once the crates are in place. Avoid punctures, stretching and gaps at corners. Where more than one sheet is needed, overlap it generously in the direction that prevents soil entering the joint.
The membrane is not an optional finishing layer. Without it, fine soil can migrate into the crate void over time, reducing storage capacity and slowing drainage. Check it again after placing the crates, particularly around pipe-entry points.
Build the crate modules on clean, level ground or directly within the lined excavation, depending on the product instructions and access available. Most systems lock together using integral clips, pins or connector plates. Make sure every crate is fully engaged so the assembly cannot shift during backfilling.
Follow the manufacturer’s stated maximum stack height and loading limits. A shallow garden soakaway and a driveway installation are not the same specification. Crates intended for landscaped areas may not be suitable beneath regularly trafficked surfaces without additional structural design.
For larger arrays, keep the layout square and stable. If the system includes a silt trap, inspection shaft or distribution pipe, fit these components at this stage. They are difficult to add once the top membrane and backfill are installed.
Cut the drainage pipe cleanly and connect it to the crate inlet using the correct adaptor or inlet seal for that crate system. A poor connection can let surrounding soil enter the tank or allow the pipe to pull away as the ground settles.
Maintain the planned pipe fall right up to the crate. Support and bed the pipe properly, then surround it with suitable granular material before backfilling. If roof water passes through gullies or channel drainage, consider how leaves, silt and roof debris will be intercepted before reaching the soakaway. A trapped gully, catchpit or accessible chamber can make routine maintenance much simpler.
Fold the geotextile membrane over the top of the assembled crates, ensuring there are no exposed sections. Overlap the top joint adequately and secure it temporarily if needed while placing the first backfill.
Backfill evenly around the crate assembly in layers. Use selected, stone-free material immediately around the membrane so it is not torn by bricks, roots or sharp rubble. Compact only as appropriate for the crate manufacturer’s instructions and the surface being reinstated. Heavy compaction directly over lightly rated crates can cause damage.
Finish the surface to suit the area – turf, planting, paving or driveway construction. Keep future access points visible or record their position, especially if they will be hidden beneath landscaping.
Before the final backfill and reinstatement, flush the incoming pipework with water and inspect each accessible joint. Water should reach the crate without backing up in gullies or standing in the pipe run. This is also the time to confirm that the gully levels and channel-drainage outlets are correct.
Do not expect a newly installed soakaway to empty instantly. Infiltration depends on soil conditions and recent rainfall. However, persistent standing water in the pipework or a visibly slow system can indicate a blocked inlet, insufficient fall, undersized design or unsuitable ground.
The most costly errors usually happen before the first crate is placed: selecting a location without testing infiltration, sizing the system by assumption, or placing it too close to a property. Other frequent problems include using impermeable liner instead of geotextile, failing to protect the membrane, omitting access for cleaning and using crates that are not rated for the load above.
It is also worth separating roof water from areas with potential contaminants. Runoff from ordinary roofs is commonly suitable for infiltration, but water from yards, vehicle areas or industrial surfaces may need treatment before it enters the ground. The right detail depends on the site and the intended use.
A correctly designed soakaway crate system is quiet, out of sight and low maintenance, but it should not be forgotten. Keep gutters, gullies and channel-drainage grates clear, inspect accessible silt traps after heavy leaf fall, and deal with slow drainage before debris reaches the underground storage void. For compatible crates, membranes, underground pipework and fittings, Speedy Plastics provides a practical one-stop source for building a complete rainwater-drainage system.









 Sign in
